
Guide to Biomechanics Training for Chronic Pain Relief: How to Start, Exercises, and a 4-Week Plan
Looking for a Personal Trainer Near Me for Chronic Pain?
If you're searching for a personal trainer near me, fitness center near me, or a physical fitness program near me that focuses on chronic pain relief and long-term strength, biomechanics-based training may be the solution.
Unlike traditional gyms that focus on calorie burn or high-intensity workouts, biomechanics personal training analyzes how your joints, muscles, and movement patterns work together. The goal is simple:
Reduce pain.
Restore mobility.
Rebuild strength safely.
Many adults dealing with chronic back pain, knee pain, hip discomfort, or post-injury limitations find that structured, assessment-based training improves function within 4–12 weeks when sessions are consistent (2–4 times per week).
Quick answer — Can biomechanics training reduce chronic pain?
Yes. Biomechanics-based training targets faulty movement patterns, joint loading, and motor control deficiencies that often maintain chronic pain. By improving range of motion (ROM), alignment, and coordinated strength through targeted mobility, stability, and progressive loading, many adults report reduced pain, improved function, and fewer flare-ups within 4–12 weeks when training is consistent (2–4 sessions/week) and guided by screening and measured progress.
What is biomechanics-based training?
Biomechanics-based training is an evidence-informed approach that analyzes how joints, muscles, and connective tissues move together and then retrains movement patterns to reduce stress and improve function. Key components:
A. Mobility: restoring joint range of motion (ROM) — e.g., hip flexion to 110–120° for functional tasks.
B. Stability / motor control: teaching the nervous system to coordinate muscles around a joint to maintain safe alignment under load.
C. Movement patterns: improving quality of common patterns (hinge, squat, lunge, push, pull, gait) to offload injured areas.
Who benefits: adults 40+ with chronic low back, neck, hip, or knee pain; post-injury returners; recreational athletes; and individuals with long-standing postural or activity-related pain. Outcomes focus on pain reduction, task-specific strength, and durable movement changes rather than short-term symptom masking.
How to start — Step-by-step plan for safe biomechanics training
Start by scheduling an initial screen with a qualified clinician or coach (physical therapist, certified biomechanics coach) and gather baseline pain levels (0–10) and activity goals.
A. Screen & red-flag check: rule out urgent medical issues before training.
1. Baseline testing: measure mobility, stability, and strength numeric targets and record in a log.
B. Program design: select mobility drills, stability drills, and strength progressions based on deficits; prioritize pain-free movement and gradual overload.
1. Frequency & load: start 2–3 sessions/week (30–60 minutes). Aim for 8–12 weeks with weekly progress checks.
2. Progression & rules: increase intensity based on objective measures and pain-guided scaling (detailed below).
a. When to pause: stop and consult if red-flag symptoms appear or if pain spikes >2 points above baseline and does not settle within 48–72 hours.
b. Reassess every 2–4 weeks and update targets.
Step 1 — Quick screening and red flags
Simple questions to screen before training:
Is your pain new, rapidly worsening, or accompanied by fever, unexplained weight loss, or night pain that wakes you?
Any recent major trauma, loss of bowel/bladder control, or progressive neurological deficit (numbness, weakness)?
Are you on blood thinners or have uncontrolled hypertension or a heart condition?
Red flags that require clinician review or urgent care:
Severe, unrelenting night pain or unexplained systemic symptoms.
Progressive neurological signs (rapid weakness, saddle anesthesia).
Recent significant trauma (fall, motor vehicle collision).
If any red flag is present, stop exercise and get medical evaluation.
Step 2 — Baseline mobility & strength checks (what to measure)
Record these simple, numeric tests:
Active straight leg raise (hip flexion) — degrees or fingertip distance to knee; target improvement +10–20° over 4 weeks.
Sit-and-reach / lumbar flexion — centimeters or pelvic tilt ease.
Hip internal rotation (seated) — degrees per side; aim for symmetry within 10°.
Single-leg balance — seconds (eyes open); baseline target 20–30 s per leg.
30-second sit-to-stand — reps; track reps gained.
Pain scale (0–10) pre/post session and pain during functional tasks (walking, climbing stairs).
How to record: use a simple table with date, test metric (number), pain score, and notes. Reassess every 2 weeks to inform progression.
Step 3 — Progression rules and programming tips
Progression rules:
Pain-guided scaling: keep in-session pain ≤2/10 above baseline and no lasting increase 48–72 hours post-session.
Load progression: increase load or complexity by ~5–10% once the target reps are achieved with good form for two consecutive sessions.
Volume progression: progress from 2 → 3 sets, then increase resistance before adding more sets.
Frequency: 2 sessions/week for initial adaptation, 3–4 sessions/week as tolerance improves.
Motor-control first: prioritize stability and correct movement before adding heavy loads.
Practical tips:
Use tempo control (3–4 s eccentric) to improve motor control.
Track objective metrics (ROM degrees, reps, balance seconds) to guide increases.
Deload for 1 week (reduce volume by ~50%) if progress stalls or pain flares.
Top biomechanical exercises for chronic pain
Below are clinic-tested exercise categories with dosages, cues, common mistakes, and easy modifications. Two Esteem Biomechanics variations are marked where noted.
Mobility exercises (examples and dosages)
Thoracic rotation (open-book)
- Dosage: 2–3 sets of 8–12 reps per side, slow control.
- Cue: keep hips stable, rotate thoracic spine toward ceiling with eyes following hand.
- Common mistakes: using lumbar rotation instead of thoracic motion.
- Modification: perform seated if supine is uncomfortable.
Hip 90/90 internal rotation mobilization
- Dosage: 3 sets of 10 controlled rotations per leg.
- Cue: keep pelvis square; move only the lower leg to isolate hip rotation.
- When to use: limited hip IR with knee/low back pain.
Ankle dorsiflexion wall-drill
- Dosage: 3 sets of 8–12 reps per side, measure distance from toe to wall to track ROM.
- Cue: keep knee aligned over second toe; minimal heel lift.
- Modification: hold onto a support for balance.
Cat-camel for lumbar mobility
- Dosage: 2–3 sets of 10 slow cycles.
- Cue: move smoothly through full flexion and extension while breathing.
- Esteem Biomechanics tip: integrate diaphragmatic breathing to reduce lumbar compressive tension.
Stability & motor-control drills
Dead bug (progressive complexity)
- Dosage: 3 sets of 8–12 controlled reps per side.
- Cue: maintain neutral spine; move limbs slowly without pelvic tilt.
- Progression: add resistance band or perform on an unstable surface.
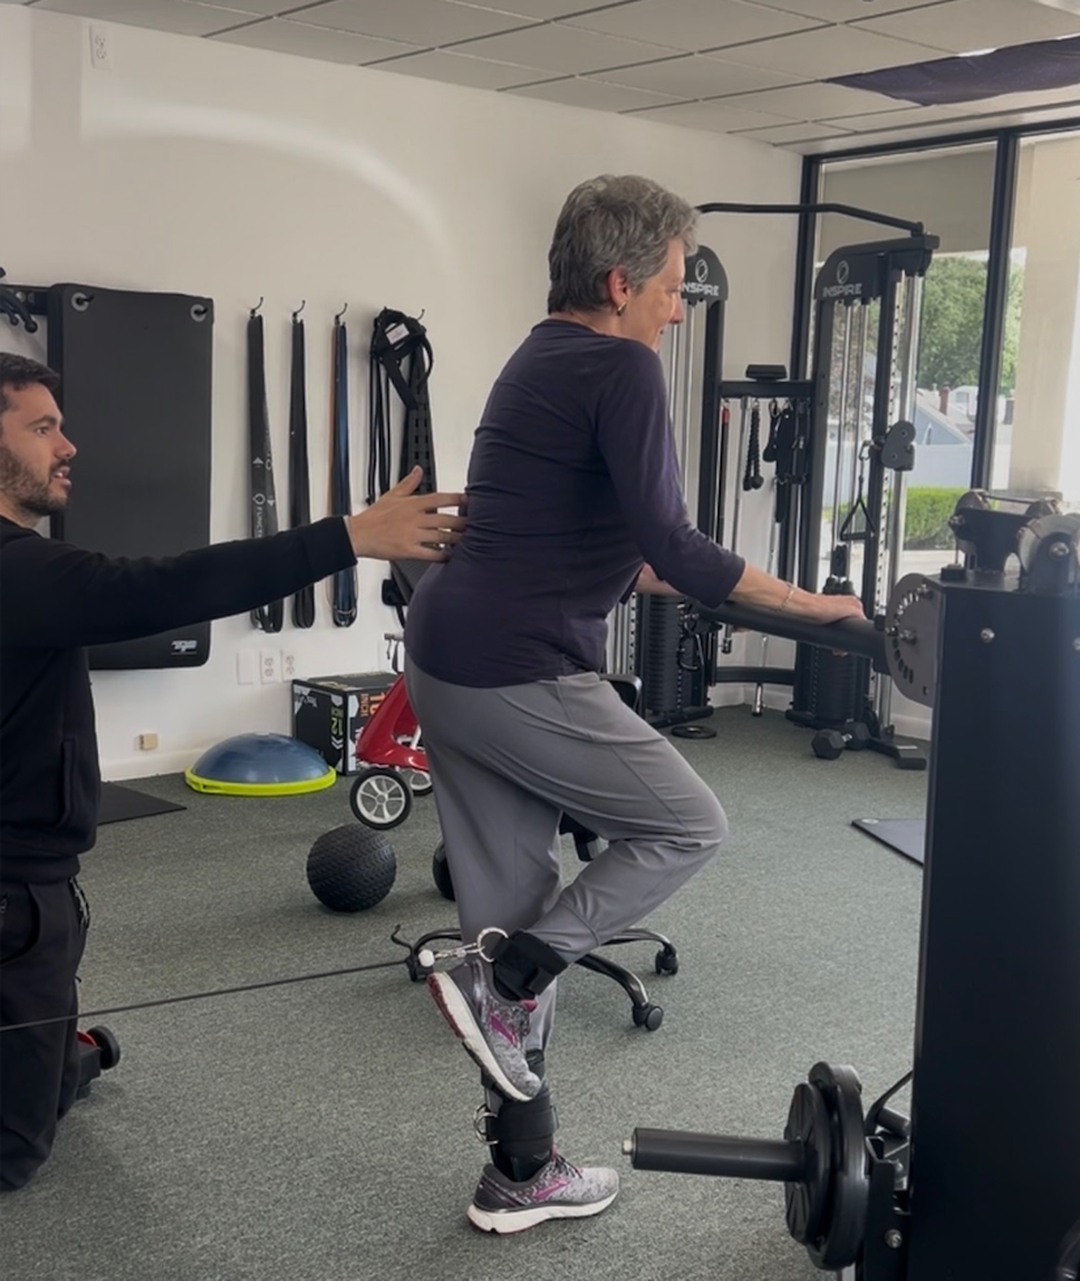
Single-leg hinge balance
- Dosage: 3 sets of 6–10 reps per leg, hold top for 2–3 seconds.
- Cue: hinge at hips, keep torso long, touch a box lightly with hands.
- Common mistakes: collapsing knee or rounding spine.
Pallof press (anti-rotation)
- Dosage: 3 sets of 8–12 reps per side, 2–3 s hold at full extension.
- Cue: resist rotation, breathe, keep pelvis stable.
Quadruped scapular control
- Dosage: 3 sets of 10 scapular protraction/retraction reps.
- Cue: move only scapulae; keep elbows straight.
- Modification: perform standing against a wall.
(These drills emphasize pain-free ranges and teach coordinated control before strength work.)
Strength-building exercises (progressions)
Hip hinge progressions — Romanian deadlift → single-leg Romanian deadlift
- Dosage: Start with bodyweight 2 sets × 8–10; progress to 3 sets × 6–8 with weight.
- Cue: hinge from hips, keep neutral spine, load through posterior chain.
- Load guidance: increase load by 5–10% when form remains consistent.
- Esteem Biomechanics variation: coached band-resisted hinge to emphasize pelvic control.
Goblet squat → split squat
- Dosage: 3 sets × 8–12 reps. Start light (goblet 8–16 kg) and progress.
- Cue: sit back, maintain knee alignment over toes, chest tall.
- Modification: box-supported squats for limited ROM.
Row progressions — band rows → bent-over dumbbell rows
- Dosage: 3 sets × 8–12 reps; emphasize scapular retraction and thoracic extension.
Farmer carry (loaded carry)
- Dosage: 3–4 sets × 30–60 seconds walks.
- Cue: tall posture, braced core, neutral neck.
- Purpose: integrates stability under load for daily tasks.
Progressive loading principles: prioritize movement quality; increase resistance once target reps and control are met for two sessions. For older adults, aim for moderate loads that allow 6–12 reps per set to build strength safely.
Sample 4-week program (beginner → progress)
Overview: 3 sessions/week (Mon: mobility + stability, Wed: strength + low-volume conditioning, Fri: combined session). Reassess after Week 4.
Week 1 — Foundation
- Session A (Mobility + Motor Control): thoracic rotation 3x10, 90/90 hip 3x10, dead bug 3x8/side, ankle wall drill 3x10.
- Session B (Strength Intro): goblet squat 2x8, band row 2x10, hip hinge bodyweight 2x8, 30s farmer carry x2.
Week 2 — Build tolerance
- Increase sets to 3 for mobility; strength 2→3 sets; add 5–10% load if control is maintained.
Week 3 — Add complexity
- Progress dead bug to limb-resisted version, single-leg hinge assisted 2x6/leg, goblet squat 3x10, Pallof press 3x10/side.
Week 4 — Consolidate & test
- Perform Week 2/3 hybrid; retest baseline measures at end of week.
Evidence, expert tips, and safety considerations
Evidence highlights:
Movement retraining that improves motor control and joint mechanics reduces chronic low back and knee pain in many patients when combined with graded strengthening and functional practice.
Objective measurement (ROM, balance, strength reps) predicts better, more durable outcomes than symptom-only approaches.
Safety & contraindications:
Contraindicated to progress load if red flags are present (neurological deficits, systemic illness).
Use pain-guided scaling: acceptable to work in mild-moderate discomfort if it resolves quickly; avoid exercises that reproduce severe or sharp pain.
Seek medical/physical-therapy assessment for persistent or worsening symptoms before continuing an unsupervised program.
Practical expert tips:
Prioritize two objective measures each week (e.g., hip IR degrees and single-leg balance seconds).
Use breathing and bracing cues to reduce unnecessary spinal compression during strength lifts.
Small, consistent gains (5–10% per week) beat sporadic high-intensity sessions for long-term recovery.
FAQ and quick reference (common questions and short answers)
How soon will I feel less pain?
Many clients notice movement ease in 2–4 weeks; measurable strength and ROM gains typically appear by 4–8 weeks with consistent training (2–4 sessions/week).
How often should I train?
Start 2–3 sessions/week, progress to 3–4 sessions as tolerated. Daily short mobility sessions (5–10 minutes) are beneficial.
What if an exercise hurts?
Stop the painful exercise, reduce range or load, and use a motor-control or mobility regression. If severe pain persists, consult a clinician.
Do I need equipment?
Basic tools (resistance bands, dumbbell/kettlebell, a box) are sufficient. Bodyweight and band progressions are effective for most beginners.
Can biomechanics training replace physical therapy?
It complements PT. If you have red flags or complex pathology, start with a physical therapist or clinician-trained biomechanics coach.
How do I know if I’m progressing correctly?
Use objective markers: ROM degrees, rep counts, balance seconds, and consistent or reduced pain scores post-session.
Are modifications available for older adults?
Yes: perform seated or supported versions, use lighter loads, and emphasize motor control before adding resistance.
Two-line takeaway
Biomechanics training reduces chronic pain by fixing faulty movement patterns and improving coordinated strength. Start with screening, measure baseline metrics, and follow measurable, pain-guided progressions.
Numbered quick tips:
1) Screen first — rule out red flags.
2) Measure two objective metrics each session.
3) Prioritize motor control before load.
4) Progress load by ~5–10% when form is clean.
5) Reassess every 2–4 weeks.
Start Biomechanics Training at Esteem Biomechanics in Waldwick, NJ
Ready to start? Call Esteem Biomechanics for your free 90-minute personalized assessment and coach-guided plan, book a biomechanics consult or 1:1 session at Esteem Biomechanics in Waldwick, NJ. All programs include an initial movement analysis, customized exercise plan, and progress tracking.
Disclaimer: this guide is general educational information and not a substitute for individualized medical advice. If you have red-flag symptoms or complex medical conditions, consult your healthcare provider before beginning any exercise program.

©2025 Copyright. Esteem Biomechanics. All rights reserved.